A flawless manicure can boost your confidence and complete your look. But when you step into a nail salon, the choices can be overwhelming. Two of the most popular options, gel and acrylic nails, often top the list. While they both create beautiful, long-lasting results, they are fundamentally different. Understanding these differences is the key to choosing the perfect manicure for your lifestyle and needs.
Let’s break down the world of gel and acrylic nails, from application to aftercare, to help you make an informed choice.
The Foundation: What Are They?
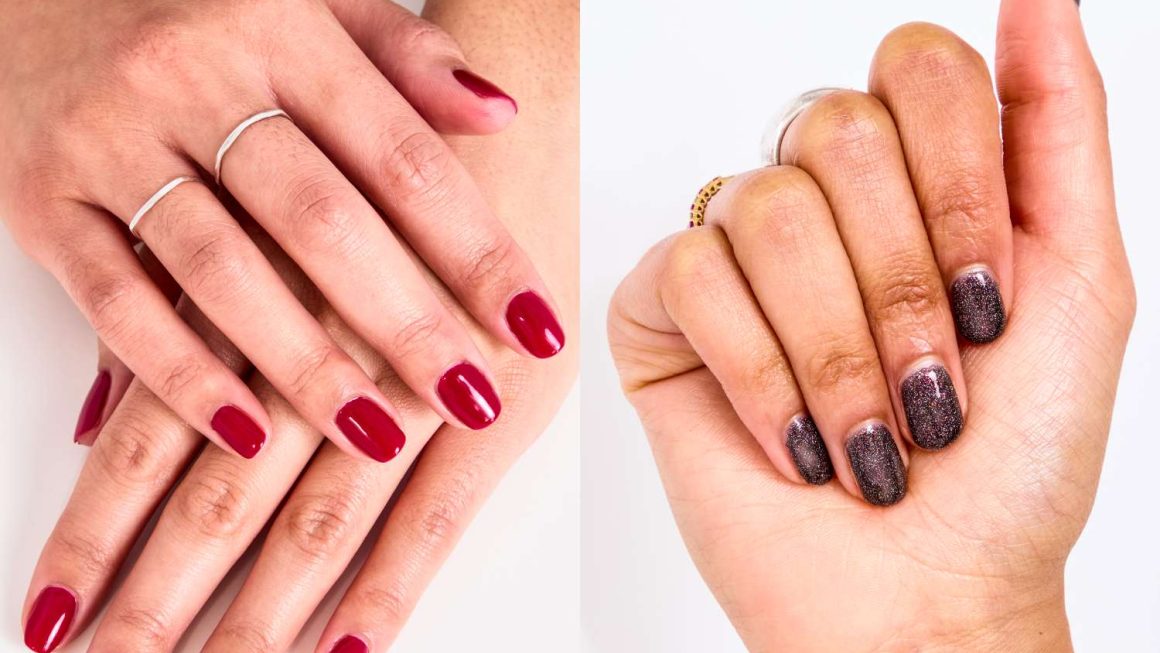
Acrylic Nails are a classic in the nail enhancement world. They are created by combining a liquid monomer and a powder polymer to form a durable, hard layer over your natural nail. This mixture is shaped with a brush before it hardens completely in the air. Acrylics are known for their incredible strength and are the go-to choice for adding significant length or completely transforming the shape of short or damaged nails.
Gel Nails are made from a pre-mixed, thick gel that is applied in layers. Each layer must be cured (hardened) under a UV or LED lamp. This curing process is what sets gel apart. Gels are renowned for their glossy, salon-finish shine that lasts from the moment you leave your appointment. They are more flexible than acrylics and offer a look that is often closer to a “natural, but better” aesthetic.
The Application Process: Liquid & Powder vs. Gel & Light
The application process is where the two techniques diverge significantly.
Applying Acrylics:
The process begins with prepping the natural nail. The technician then dips a brush into the liquid monomer, then into the powder polymer, creating a small bead of acrylic. This bead is carefully placed and shaped on the nail before it air-dries. It requires considerable skill to sculpt the acrylic smoothly and evenly. Once the nails reach the desired length and shape, they will be finely buffed and polished with an electric file, and finally coated with a top coat.
Applying Gels:
After nail prep, a base coat of gel is applied and cured under the lamp. This is followed by one or two layers of colored gel, each cured separately. The process finishes with a top coat that is also cured, locking in that high-gloss shine. The process is generally less pungent than acrylics, as there are no strong liquid monomers involved.
Durability, Maintenance, and Look
This is often the deciding factor for many people.
- Strength and Durability: Acrylics are the undisputed champion of durability. They are very hard and resistant to breaks, making them ideal for those with physically demanding jobs or hobbies, or for anyone who is rough on their hands. Gel nails are strong but more flexible. They are less likely to break but can be more prone to lifting if not applied correctly.
- Appearance: Gel nails win on shine and clarity. They provide a flawless, glossy finish that doesn’t require additional top coats to look wet. Acrylics, unless covered with a gel top coat, have a more matte finish and can sometimes look slightly less natural, especially if the application isn’t perfect.
- Maintenance: Both require fills (or infills) every 2-3 weeks as your natural nail grows. The process is similar for both: the regrowth area is gently filed, and new product is applied to blend with the old. Neglecting fills can lead to lifting and potential breakage.
Making the Choice: Which One is Right for You?
Your choice should align with your goals, lifestyle, and nail health.
Choose Acrylic Nails if:
- You need to add significant length to very short nails.
- Your natural nails are weak and prone to breaking, and you need a strong protective layer.
- You are looking for the most durable and budget-friendly option for long-term wear.
- You don’t mind a slightly thicker feel on your nails.
Choose Gel Nails if:
- You prefer a more natural, glossy look that mimics healthy nails.
- Your main goal is chip-resistant color and a high-shine finish.
- You have a sensitivity to the fumes (smell) of acrylic liquid.
- Your natural nails are in relatively good condition, and you are looking for a strengthening overlay rather than extreme length.
Pro Tips for a Perfect, Healthy Manicure
No matter which option you choose, the health of your natural nails is paramount.
1. Invest in a Professional: The biggest factor in nail health is proper application and removal. A skilled technician will avoid over-filing your natural nail bed. Additionally, professional manicure kits can reduce damage to the nails.
2. Never Peel or Pick: It can be tempting, but peeling off your enhancements will take layers of your natural nail with it, leaving them thin, weak, and damaged. Always opt for professional soak-off removal.
3. Give Your Nails a Break: After several back-to-back applications, consider taking a few weeks off. Use this time to nourish your nails and cuticles with oils and treatments.
4. Hydrate, Hydrate, Hydrate: Regularly apply cuticle oil. This keeps the skin around your nails healthy and helps prevent the enhancement from lifting.
5. Communicate Clearly: Be open with your nail technician about any pain, sensitivity, or lifting you experience. Good communication ensures a better result and a healthier manicure.
In the end, the “perfect” manicure is a personal choice. Acrylics offer unbeatable strength and length, while gels provide a flawless, glossy finish with incredible chip resistance. By understanding their unique properties and caring for them properly, you can enjoy beautiful, long-lasting nails that perfectly suit your style and life.